


How to Clean Mineral Specimens?
Mineral cleaning and preparation is such a complex subject that it could easily fill a whole book. This article is a brief introduction of available mineral cleaning methods and their pros and cons.
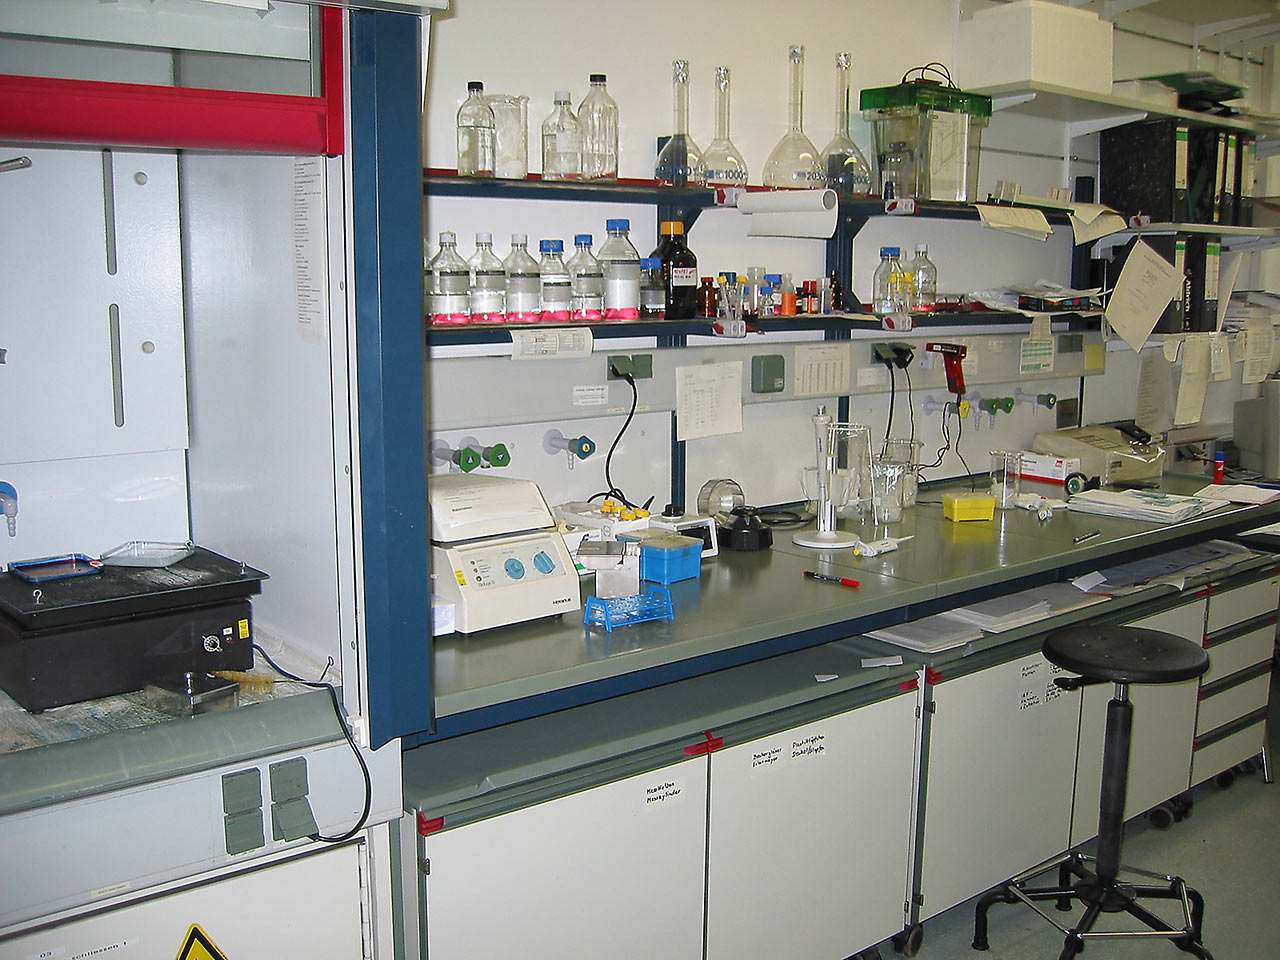
This article includes a discussion of various tools and the results of using them, and touches on a topic deserving a book of its own: cleaning minerals with chemicals, and the handling of the chemicals used.
Disclaimer: Some links in this article are affiliate links. We may get paid if you buy something or take an action after clicking one of these. It has absolutely no effect on the final price for you.
HOW TO CLEAN A MINERAL SPECIMEN?
Almost any mineral can be cleaned - however, it is not always worth the time and costs involved in such procedures. If you are unsure about chemical cleaning or advanced preparation methods, don't hesitate to contact a specialized lab.
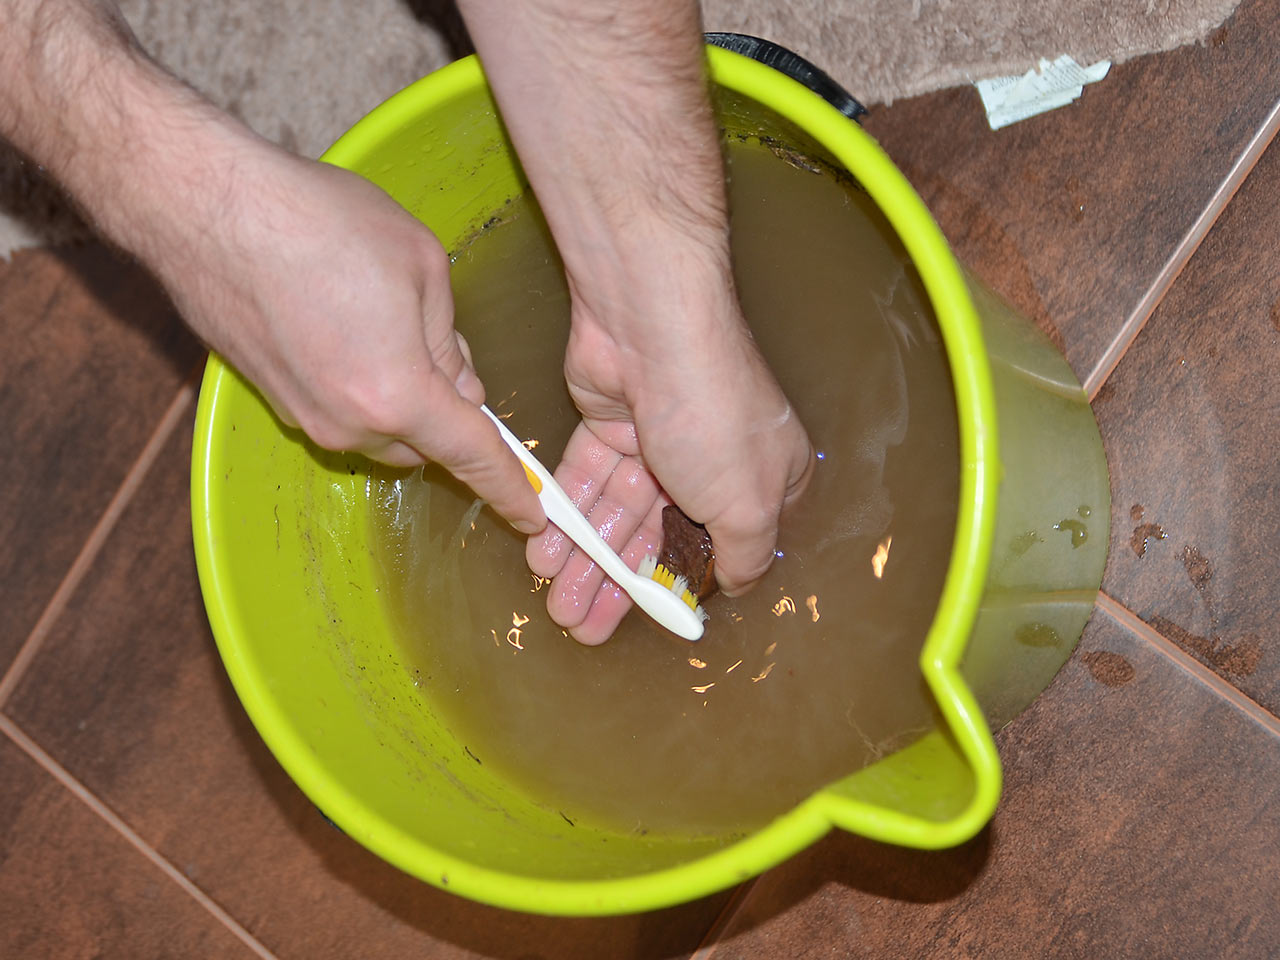
The first thing to try is just a good old fashioned wash. Almost anything can be pre-washed in water, except of water soluble minerals and very fine hairy minerals. When using water, some mechanical cleaning is often needed - common tools are toothbrushes, picks or even textile cleaning waterguns. (You can use dishwasher too - but at your own risk!) If that is still not enough, power tools, air scribes, sandblasters and chemicals can remove almost anything.
WASHING
Water
Many specimens can be cleaned just by soaking in water for a while followed by a little work with a brush. An old toothbrush is probably the most common tool used but if the texture of the mineral calls for it you can also use a scrubbers or a dish brush. Let the mineral soak for some time if the dirt or clay on it can't be removed.
Some clays especially are very resistant: for these, using a good water gun is much better then long days of soaking and brushing. Particularly obstinant clays can be removed by soaking and drying repeated in several cycles. Sometimes a detergent can help, especially with some clays. Hairy specimens (like some zeolites) can be soaked but of course brushing is out of question.

Water soluble minerals like halite, chalcanthite, melanterite, langite, borax and others must be cleaned in alcohol or a concentrated solution of salt. This requires some experience and many of these minerals must be properly conserved too!
Picks
Wooden toothpicks are fine for removing clay from tiny fissures in softer minerals. Steel dental picks (which we all hate) can be put to much better use removing more resistant crusts and stains from really hard minerals like quartz, garnets, beryl, tourmalines or topaz. Better test the hardness of the mineral before you scratch the best crystal face!
Ultrasonic Cleaner
The ultrasonic cleaner is a handy device for cleaning more resistant coatings, clays and other mess. Basically, it shakes both liquid and mineral, speeding up the process of cleaning by shaking off debris from the mineral specimen.
Stainless-steel lab ultrasonic cleaners are way better then cheaper plastic cleaners. Lab devices are much more powerful and durable and most are equipped with heating and timer. For most specimens the 2-3 liter cleaners are the best. The $70-150 on such device is very good investment and saves you a lot of brushing and scrubbing.
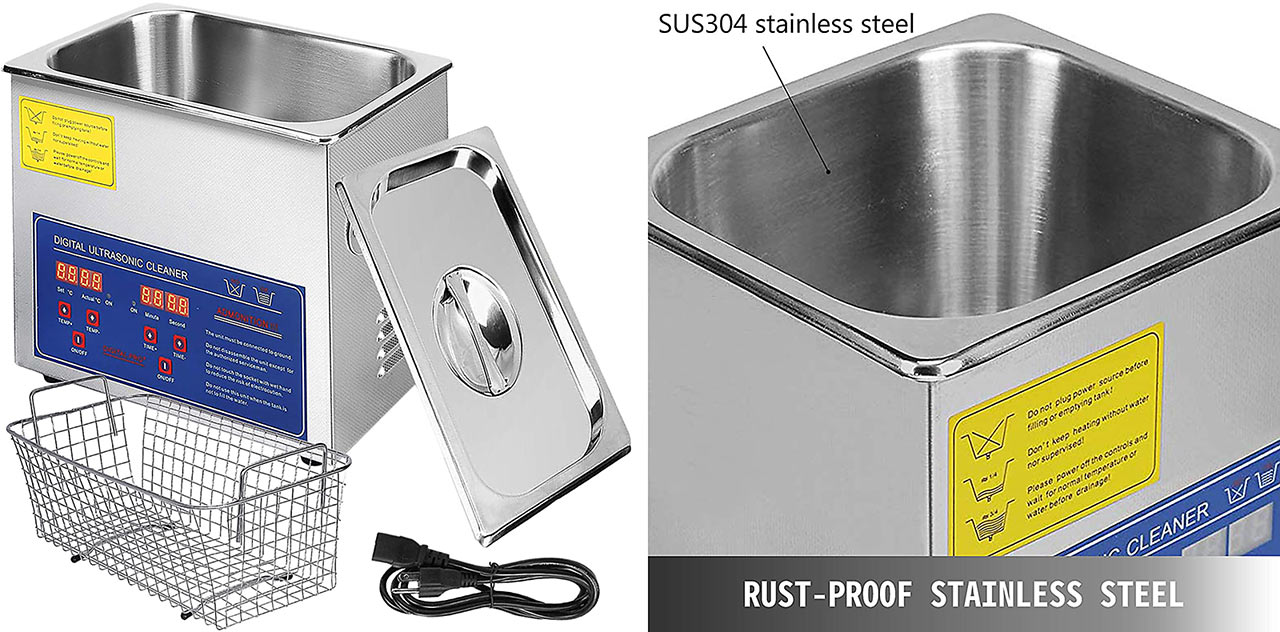
Be sure to put the sample inside a glass or plastic beaker to prevent the mess from interacting with the ultrasonic cleaner container. You can also add detergent or use acids, bases and salts instead of water inside the beaker - not directly in the ultrasonic cleaner! Heating may speed up the cleaning process too.
Do not put fragile or delicate mineral specimens inside the ultrasonic cleaner or they might get damaged! Ironically, mild ultrasonic cleaning might be good for cleaning some hairy specimens. The sound of working ultrasonic cleaner could be annoying for some people.
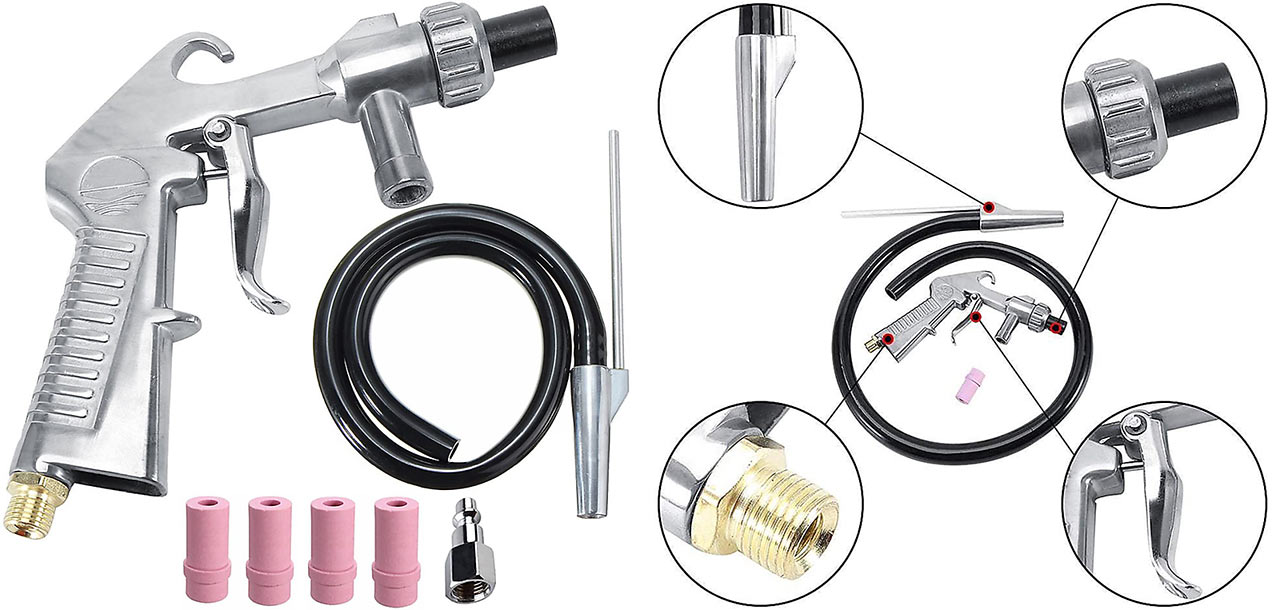
Textile Cleaning Waterguns
Water cleaning guns - originally designed to clean textile printers - are a nice devices for dealing with complicated shapes, hidden corners, tiny fissures and ugly clays. The nozzle can be often adjusted from a soft cleaning spray to a powerful water jet.
Hard and resistant clays can be removed in seconds, as well as ugly stains and coatings. Cleaning guns can even remove clays or iron oxides from tiny fissures or chip away soft minerals. It is wise to use cleaning gun before you soak your iron stained specimens into some chemicals - it saves both time and money.
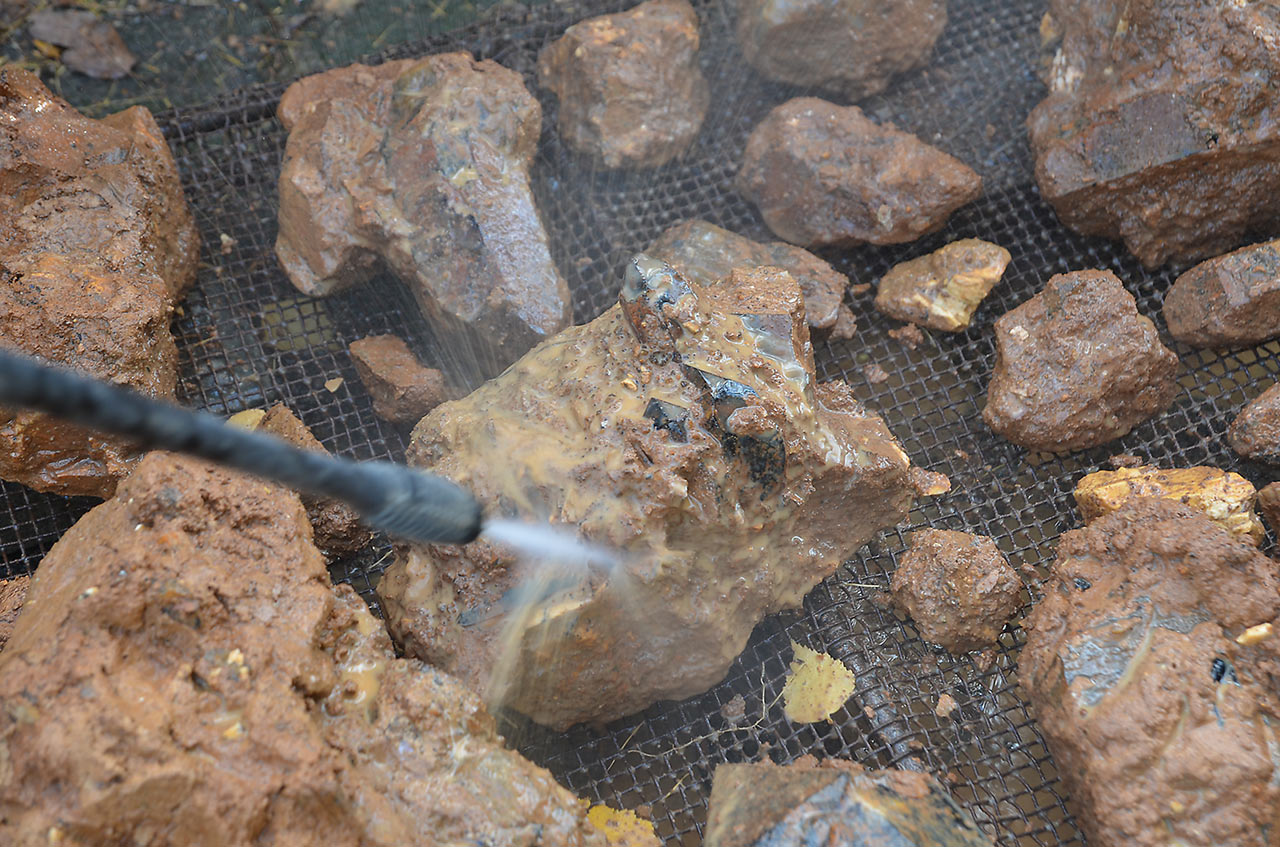
Textile cleaning waterguns must be handled with care - not only because your specimen might be damaged, but because if the water stream hits your hand or finger it will feel like an electric shock. The outcome of this is that you may drop the specimen you're cleaning, causing it the damage you were seeking to avoid.
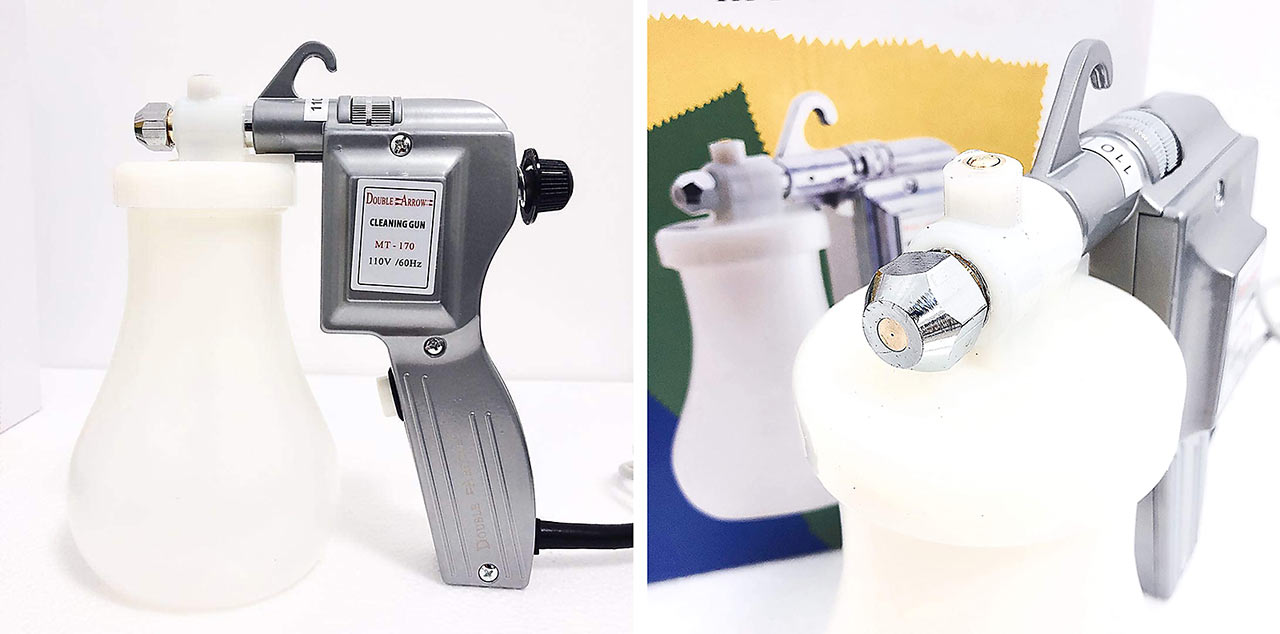
Be very cautious when cleaning soft minerals, delicate crystals (zeolites and other sensitive material) and minerals with perfect cleavage. Better test first on second grade specimen or backside and adjust. Start slowly and do not push power too much, it can easily result in mechanical damage if too much pressure is used.
MECHANICAL PREPARATION OF MINERALS
Many specimen require some sort of mechanical preparation, from trimming with various hammers and chisels to trimming devices to professional preparation with sand blasters and air scribes. The latter require access to the high-power air compressor. This is a serious investment, but quite worth it if you do a lot of preparation work.
Trimming and Cutting
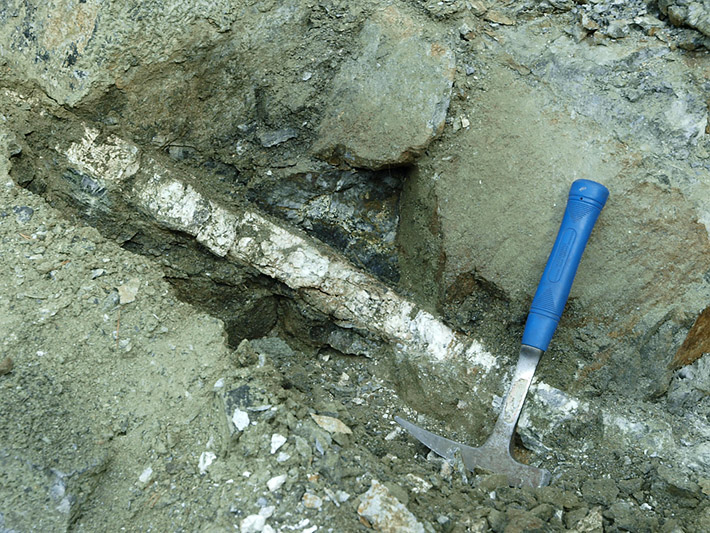
Many specimens come in some unpleasing shape. Reshaping specimens by trimming is an art of itself and can easily be the subject of an entire article. The desired shape can be achieved the old fashioned way - with chisel and hammer. However, this method requires a lot of experience and skill. Every field collector has ruined many specimens with too much force or too much trimming. Usually most trimming work ends with that one extra blow that wasn't needed. Special mechanical or hydraulic trimming devices can be used for more precise work.
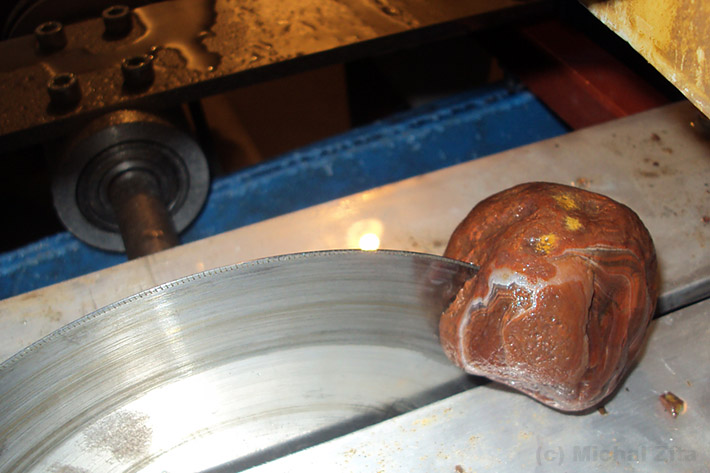
If you need to trim some fragile or cracked material, power tools with diamond blade are much better choice. You can cut off the excessive material and later reshape the cuts to a natural appearance with an air scribe. Delicate preparation should be finished manually with a tiny hammer, preparation needle and microchisel. A much more precise air scribe provides the best results.
Trimming of specimens with perfect cleavage - like fluorite or calcite - should be made with extra caution. If you are not sure how to trim some high quality piece, better leave it as it is or let professionals do it.
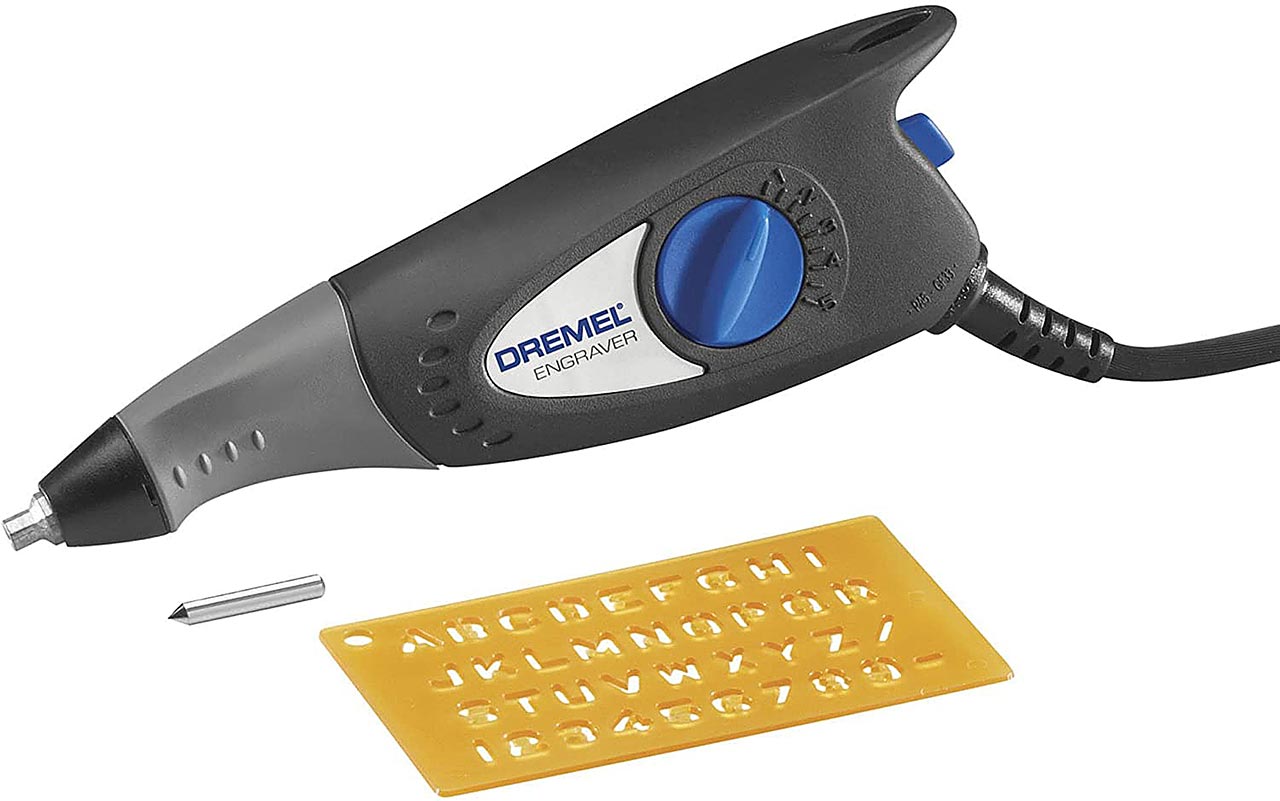
Electric Engraver
Electric engraver by Dremel is a cheap and handy tool. It is originally designed to engrave into the metals and glass but of course can be used for formatting and trimming mineral specimens too. It is not as powerful as a professional air scribe but it can handle decent prep work. The huge advantage is the price about $20. And even better, you do not need any expensive and big air compressor.
Of course, engraver is a small device with limited power. Preparation of some bigger specimens is long and annoying process, also preparation of some hard specimens is a problem. You can use the engraver even in your appartment, it makes some noise though. If you have limited budget and/or space, combination of the textile cleaning gun and the engraver provides pretty decent results and can be used even in your bathroom.
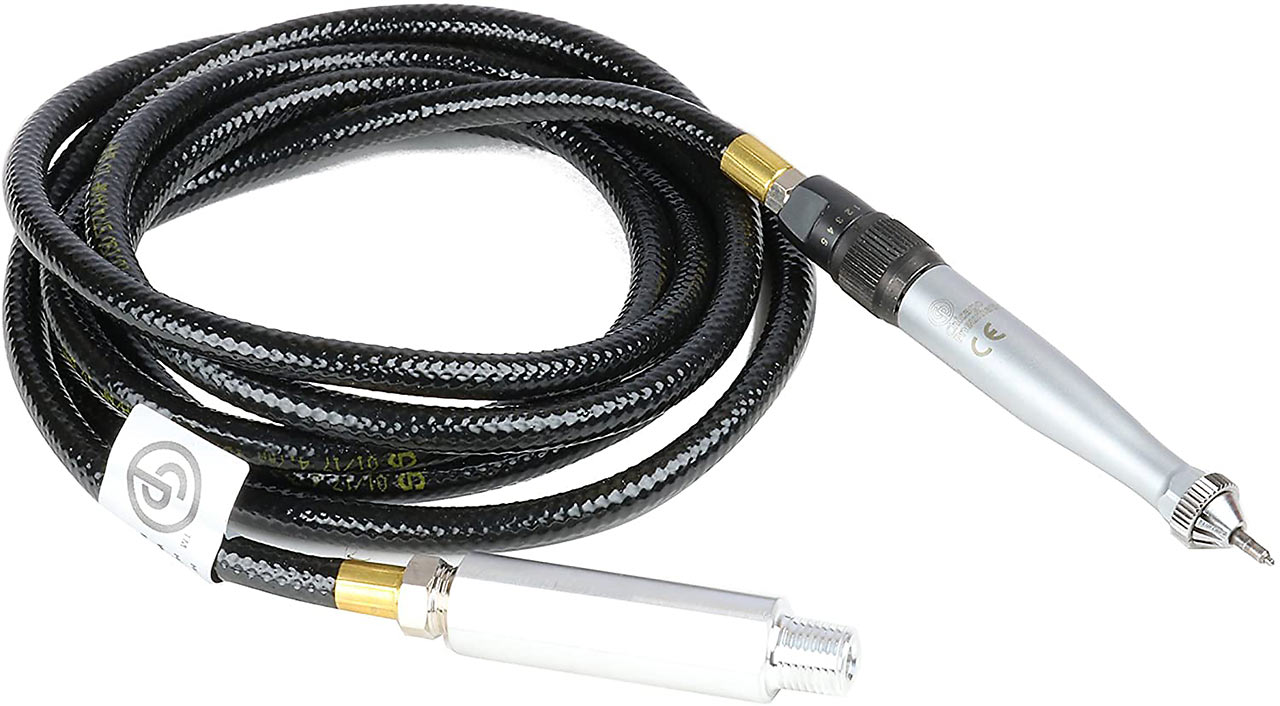
Air Scribe
An air scribe is a tiny chisel powered by compressed air. It allows use of various shaped tools very precisely, without damaging the specimen. It can be used for both preparation work or reshaping ugly power tool cuts. Cheaper air scribes start at $70, high quality tools cost well over $200. The price is without air compressor.
Sandblaster/Bead Blaster
Sandblasters are often used to remove everything from highly resistant coatings to soft matrix. Many media of various hardness can be used - sand, glass, carbonates or plastic. The goal is to choose a media softer than the mineral you want to keep but harder than the mineral you want to remove. Make sure to test both media and pressure before you use it on your best specimen. If the pressure is too high, even soft media can damage much harder material! Sandblaster itself without air compressor costs only $30-50.
Both air scribe and sandblaster require a compressor to run. However, less powerful versions without the need of compressor exists too. If you buy a compressor, make sure it provides proper pressure output for your tools.
CHEMICAL CLEANING OF MINERALS
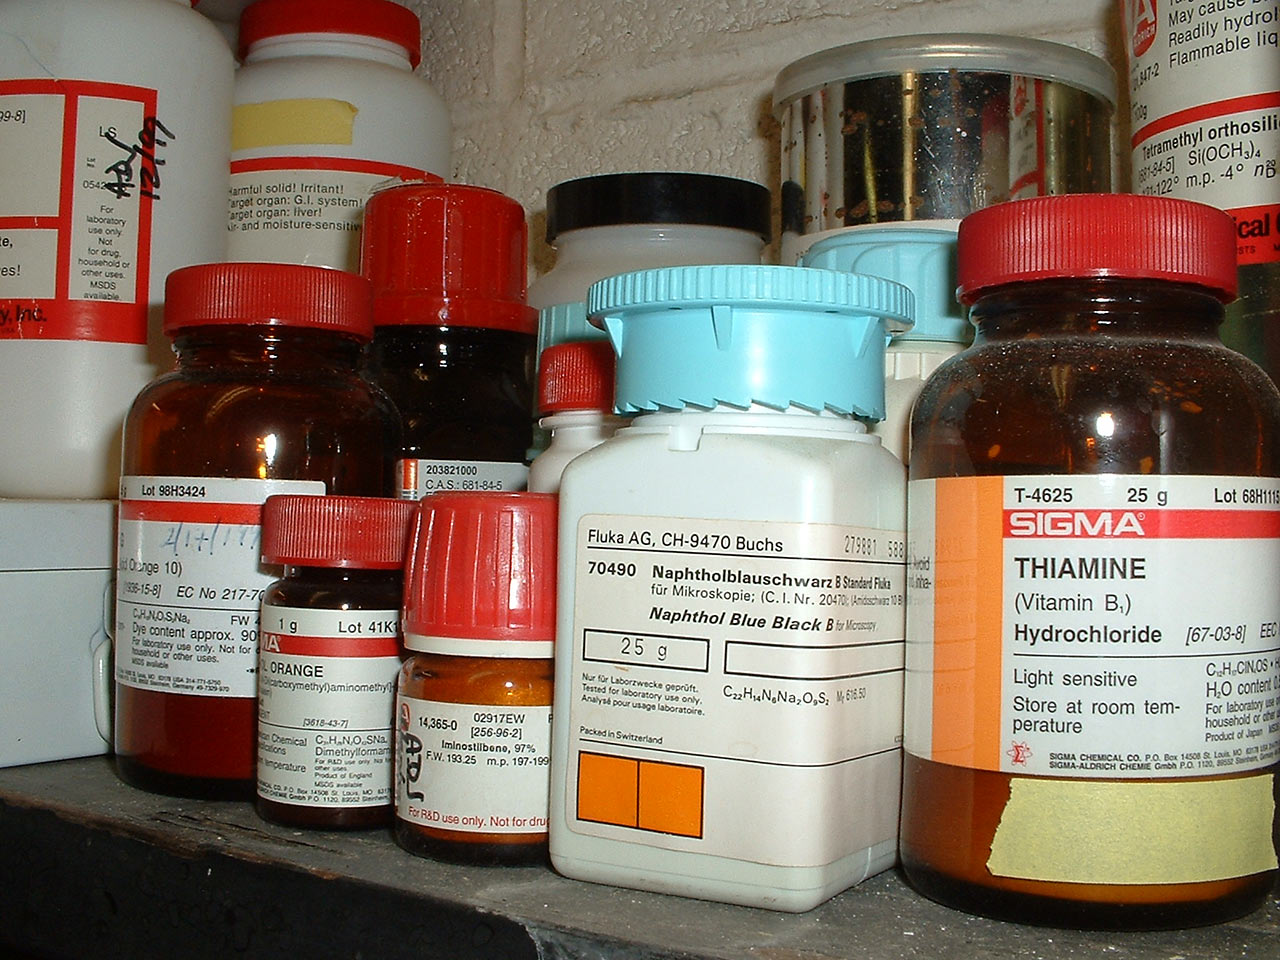
Chemicals can be very efficient cleaners, but they could be also extremely dangerous. Make sure you know how to properly handle all used chemicals. To ensure that make sure that no one will accidentally use them for something inappropriate, keep all your chemicals properly stored in a locked cabinet or box. The most insane idea is to store chemicals in unlabeled containers inside your fridge. Believe it or not, many people have unintentionally poisoned themselves - and some died - in this way.
Particularly strong acids, bases and toxic chemicals should be used only in properly equipped lab. Do NOT try to create new and untested mixes of chemicals - among other things, these can boil, explode, or produce highly toxic or corrosive gases. Also make sure you don't break the law - many chemicals that are legal in Europe are illegal in USA and vice versa.
Highly corrosive and toxic chemicals are very dangerous. Just one stupid move can result in irreversable consequences. I am trained in professional chemistry lab and I have seen many accidents. They happen all the time - make sure they don't happen to you!
It is highly recommended that you use diluted chemicals. Diluted acids and bases are much less dangerous and there is enough time to check what's going on in your cleaning bucket. If you have no experience with a particular mineral and chemical combination, do a test on a less valuable piece first.
Acids
Many acids are used for cleaning or etching away unwanted minerals. Oxalic and citric acids are white crystalline compounds, all other widely used acids are liquids. Pure acetic acid (glacial acetic acid) freezes slightly below the room temperature.
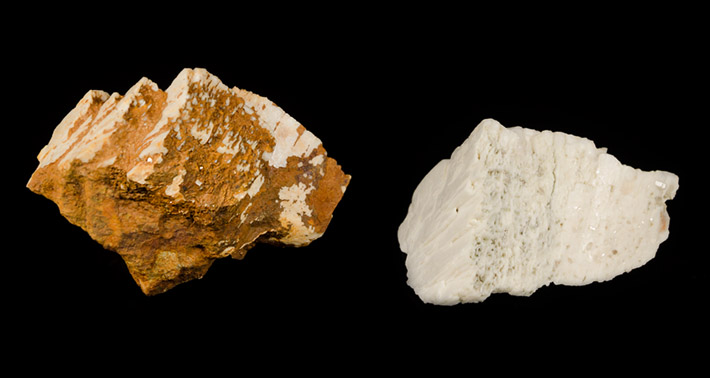
Oxalic acid (also sold as Wood Bleach) is often used to safely remove iron stains from many minerals. However, it can damage calcium bearing minerals (like fluorite or calcite) or micas and other sensitive minerals. Additionally, oxalic acid sometimes produces ugly coatings or yellow precipitates. Always use distilled water for oxalic acid and do NOT boil the solution! If you need to remove iron stains from calcite, micas or fluorite, use sodium dithionite (see below).
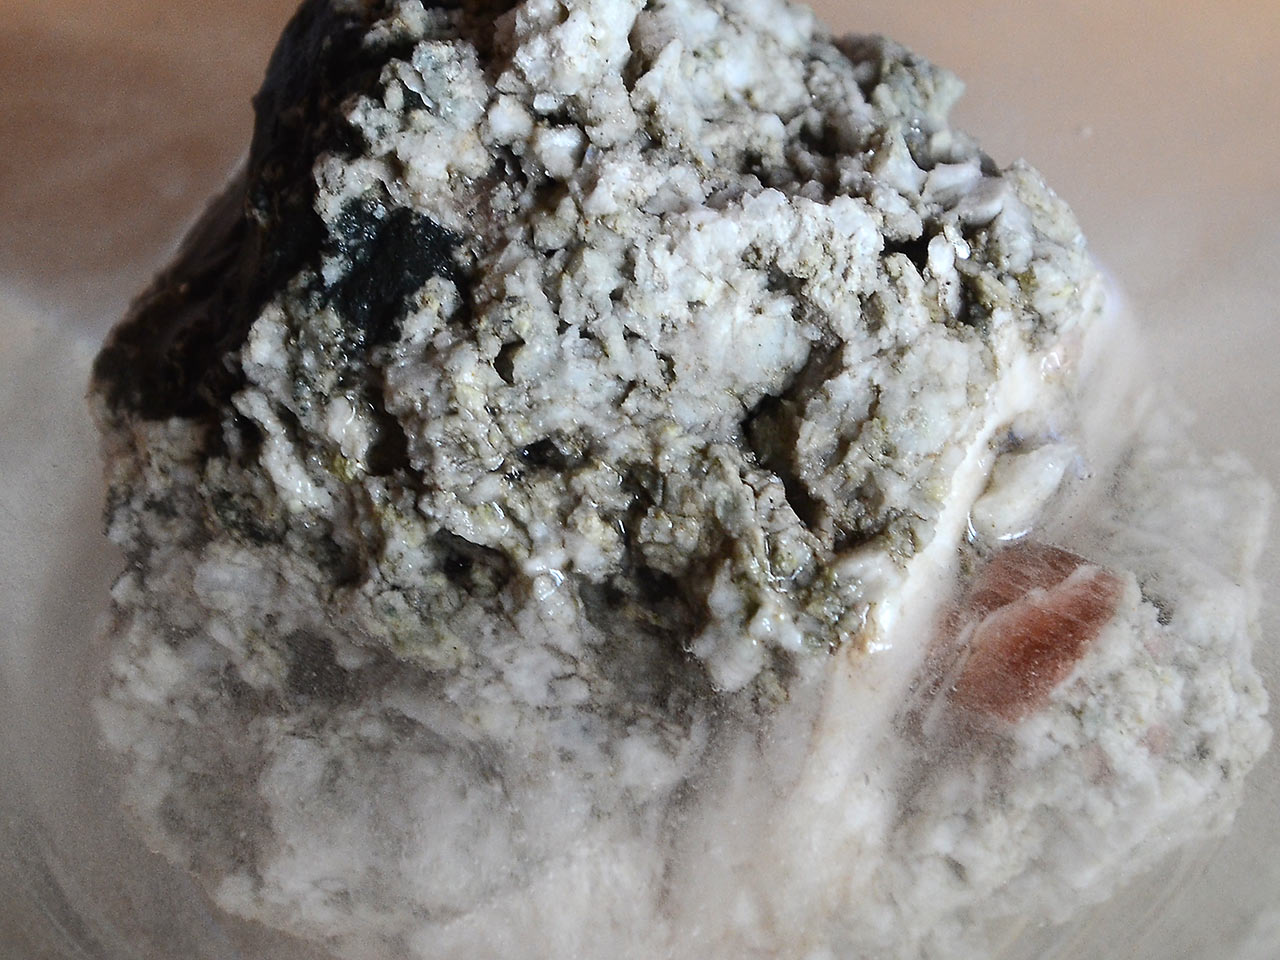
Dilluted acetic acid is a safe way to remove calcite from fluorite or sulfides. Muriatic (hydrochloric) acid can be used to remove some iron stains or calcite too. However, keep in mind that its fumes are highly corrosive and it is very aggressive mineral acid. It can dissolve most carbonates and damage many phosphates, silicates and sulfides.
Hydrofluoric acid is used to remove the quartz from gold specimens or fluorite. This acid is one of the most dangerous and toxic materials you will ever see - NEVER use it unless you are a professional chemist!
Citric acid and oxalic acid are not smelly and can be used indoor as they do not produce any toxic or corrosive vapours. However make sure not to drink oxalic acid, it is toxic. Dilluted acetic acid (vinegar) is not dangerous but produces ugly odour. Beware of highly concentrated acetic acid (glacial acetic acid) - it is highly corrosive and flammable!
Other strong acids like hydrochloric, nitric and sulfuric should be locked and kept outside your house. They produce highly corrosive fumes and can easily cause damage to your house or anyone handling them. Strong acids should be used only by experienced person! Breathing highly corrosive fumes or spilling the acid on your skin can produce serious consequences.
The special warning must be given regarding hydrofluoric acid, which is extremely dangerous and should be used only in the well equipped lab by professionals. This acid is quite volatile and also extremely corrosive and poisonous. It damages glassware, etches eyes, teeth and just a little spill on the skin can result in fatal gangrene. Chloric acid is also highly dangerous as it can explode if mixed with any reducing agent.
Hydroxides
Hydroxides can be used for removing organic matter like moss, lichens and algae. However, only dilluted (5-10 %) hydroxides should be used. The solid hydroxide should be very slowly added to water. The solution may violently boil if you pour water into solid hydroxide or put a lot of hydroxide into a water at once.
Concentrated (40 %) sodium or potassium hydroxide is extremely aggressive to skin and flesh, especially when used in hot solution. Acids usually produce only burns on the surface while hydroxides dissolve the flesh and produce very nasty permanent injuries!
Chemical Salts
Certain salt solutions are also used for cleaning. The most popular are the famous Super Iron Out (SIO) or Waller Solution. The key ingredient in both of these is the sodium dithionite. It removes iron stains without the nasty side effects and danger of acids. However, sodium dithionite is unstable and decomposes pretty quickly in the solution. You should always prepare fresh solution for mineral cleaning and store the solid sodium dithionite or SIO well sealed.
The decomposition of dithionite may result in sediment of gray-yellowish sulfur precipitate. It can be just washed away, in worst case sulphur can be dissolved by toluene. Dark green-black precipitate after sodium dithionite treatment can be dissolved in citric acid or more sodium dithionite.
Never mix sodium dithionite with strong mineral acids as it immediately decomposes to create highly corrosive sulfur dioxide gas. Sodium dithionite (or SIO and Waller solution) treatments should be done outdoors or in ventilated lab to circumvent the effects of the stinky and corrosive gases these produce. Sodium dithionite solution is slightly acidic and can be buffered by sodium hydrogencarbonate (baking soda) to prevent etching of carbonates.
Mineralexpert.org is a participant in the Amazon Services LLC Associates Program, an affiliate advertising program designed to provide a means for sites to earn advertising fees by advertising and linking to Amazon.com. See our privacy policy for full details.
Comments